I have finished the design of our first project an easy to build nightstand. The nightstand is dimensioned for a room at the beach house I am helping makeover. However you can make it any size you would like. It is 13 3/4” Wide x 16” Long x 23 3/4” Tall. You can build it with or without the bottom shelf. I have designed this to use 2”x2” legs. I have had a difficult time finding 2”x2” Pine Legs so I am going to use 2”x2” Poplar legs for mine. I am going to be painting mine white so it doesn’t matter that the wood is different. An option you could use would be to use 2”x4” Studs as the poplar 2”x2”x36” are about $5 a piece and you can get the studs for $2 a piece and get all 4 legs from 2 2x4’s. If you use 2”x4” Studs you will want to turn the wide edge to align with the longest side of the table. This way when you look at the nightstand from the front you get a narrower leg.
This is really up to you, as you can orient them any way you would like, however typically when building furniture you want to balance the symmetry or the piece so wider widths tend to line up with each other and likewise for the narrower widths. If you are interested in seeing a diagram of this let me know and I will draw it up and post the picture. Just let me know. I am going to suggest you build this with pine to keep costs down and the pine boards from a Lowes/Home Depot tend to be straighter than the cheaper whitewood you can also get.
Okay let’s get to the materials and tools list.
Materials:
2 – 1”x3”x72”(6ft) Boards
2 – 1”x2”x72”(6ft) Boards
4 - 2"x2"x36"(3ft) Poplar or Pine if you can find it or 2 - 2"x4"x96(8ft)" Studs
Suggested tools:
10” Miter Saw
Random Orbital Sander (ROS) You will also want 120grit, 150 or 180grit and 220Grit.
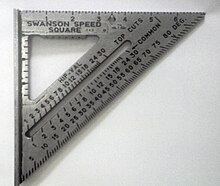
Speed Square or Framing Square

*If you are going to use a Kreg Jig on this project you will want to use the coarse screws since pine is a softer wood.
Wood Glue: I use Titebond III but I know a lot of people use Gorilla glue. I have yet to use it. Maybe one of these days I will break down and get some and give it a try.
** Clamps: How could I have forgotten these…. You will want to have at least 2 - 24” Clamps. We will need these clamps to keep the top tight while the top glues.
***If you would prefer not to use clamps I can show you how to use the Kreg Jig to edge join the top boards. Clamps can get expensive but you will need them if you are going to do lots of projects. I don’t think you can have to many clamps.
I believe that should get us started with this build.
If you have any questions make sure to comment below or shoot me an email.
Have a Great Day!


The only tools we have are a drill and a circular saw. I was looking on e-bay at the Kreg Jigs, and I am wondering if you have a recommendation between the R3, K3, Master, and Jr. (I think that is all I saw). Also, do you have to use special Kreg Jig screws with this because it looks like they are encouraging you to buy screws with the Kreg Jig. Thanks!
ReplyDeleteRoxanne,
ReplyDeleteIf you are going to buy one and can afford it the Master system is the way to go. It will come with the main Kreg Jig system and has a removable guide that you can use in a similar fashion as the Jr. I plan on upgrading to the master system in the future. If you want to save some money you can get the Jr. but you will also want to buy the Face Clamp or similar clamp.
As far as the screws, you don't have to use the Kreg screws but I highly recommend it. They are designed to work in the pocket holes and are self tapping so they provide a much better grip than a normal screw would. I know I have seen bulk amounts of screws for fairly good prices on eBay as well.
Now since you have a circular saw I would recommend you also use a product like the Kreg Square-Cut. I know I know I am harping Kreg a lot but they do make a good tool and this just happens to be another neat one. http://www.kregtool.com/products/ka/product.php?PRODUCT_ID=121
This will allow you to get a good quick cut across your board. There are other products out there that do the same type of thing as well.
I hope that answers your question. Let me know if I can answer any others for you.
Grover
Oh, so I can use the Kreg Square-cut in place of a miter saw? Or I should still get the miter saw? Sorry I am so ignorant about all this - thanks for being patient!
ReplyDeleteRoxanne: Yes you can use the Square-cut with the circular saw instead of a miter-saw. I would recommend that if you are wanting to get into building multiple pieces it will be much easier with a miter saw, but you can accomplish the Nightstand with a circular saw. If you are wanting to really get into woodworking you will want a table saw. That is the more or less the backbone of the shop. You can cross-cut and rip boards to width among other things.
ReplyDeleteDon't apologize about asking questions. That's one of the reasons I started this blog. Feel free to as as many questions as you like.
Grover